
Canva is a great design tool and allows for a lot of flexibiity when it comes to creating unique, branded custom designs. When going to print there are a few basic file requirements that need to be met. Bleeds and crop marks are arguably the most important for digital printing.
As a simple explanation, bleed is where any content runs to the edge of the document. For file setup we need the content that goes to the edge to actually be slightly larger than the document so that when we cut out the print piece, we have a little ink to cut through, otherwise we would have to trim the final piece slightly smaller than intended.
Crop Marks are simply the marks that tell us and our machines where to cut the final print piece.
This guide is meant to help provide step by step instructions for making your Canva designs print-ready by adding bleed and crop marks.
How to Add Bleed & Crop Marks in Canva
- Open your design.
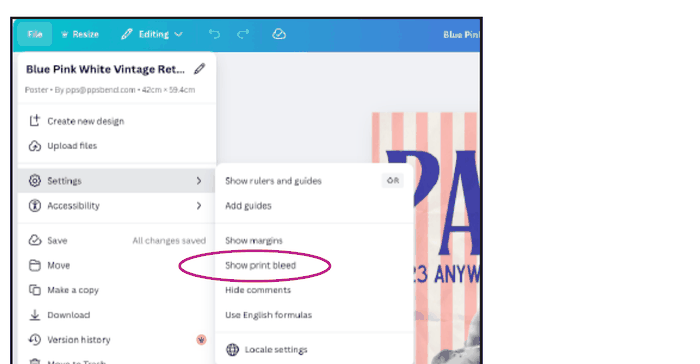
- Go to File → Show print bleed.
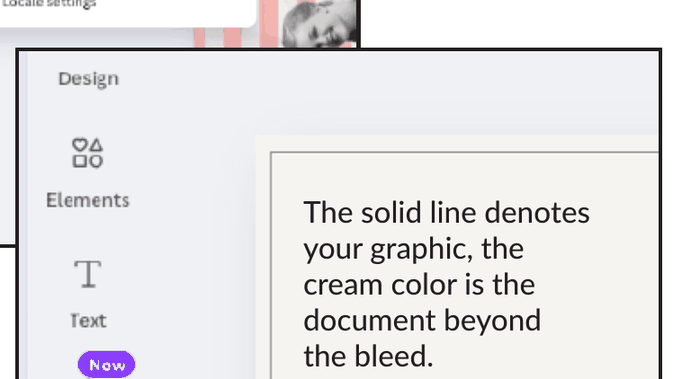
- You'll see a solid black line showing where your content extends beyond the page. The solid line is where your design will be cut, and the image extending beyond it allows your printer to "print" all the way to the edge of the page.
Rule of thumb: Keep important stuff inside the line. Extend backgrounds and photos past the line.
Adding Bleed to Your Design
-
Solid colors
Click the background → drag corners so the color extends past the line. -
Photos or graphics
Click the image → drag corners outward so it extends past the line. -
Borders
If you want a white border, keep it inside the line and leave the bleed area empty.
How to Download a Print-Ready File in Canva
1. Finish your design
Make sure:
- Bleed is added (File → Show print bleed).
- All images or backgrounds extend past the dotted line.
- Text and logos are safely inside the dotted line.
2. Open the download menu
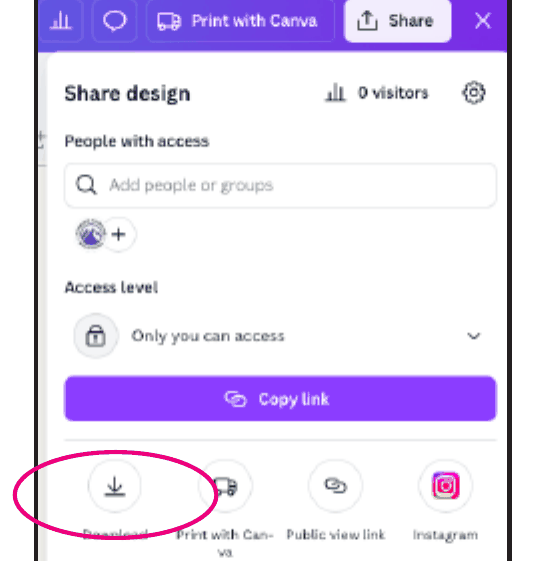
- Click the Share button (top right).
- Select Download.
3. Choose the correct print settings
In the download panel:
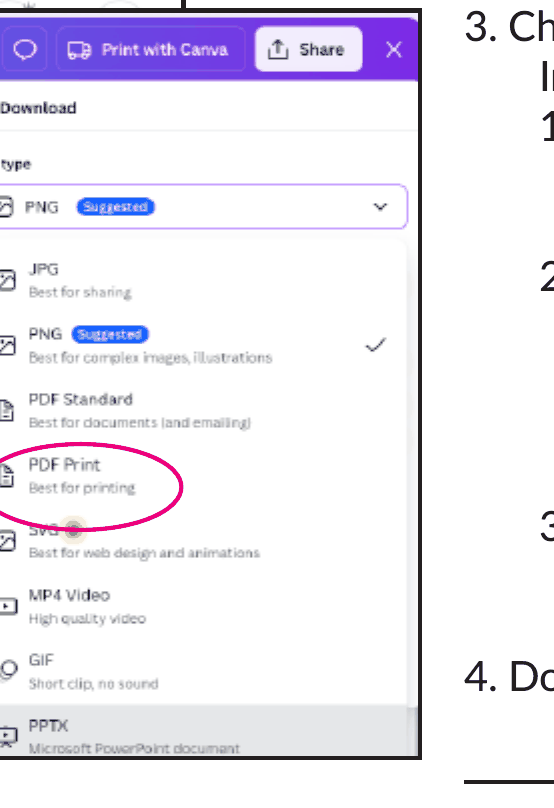
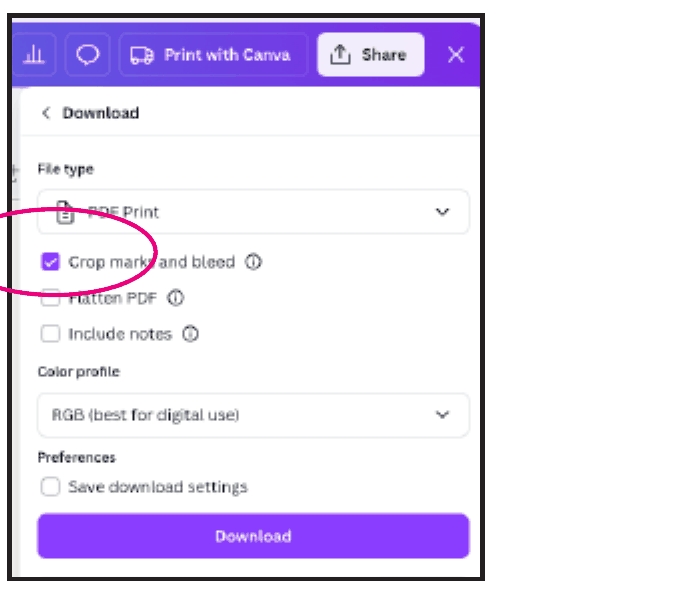
- File type: Choose PDF Print (the highest-quality format for printing).
- Add bleed + crop marks: Check the box for Crop marks and bleed — this tells the printer where to trim and includes your bleed.
- Color profile: Change to CMYK (only available with Canva Pro accounts).
4. Download
Click Download and you're ready to send us your file.
Best Practices
- Always turn on "Show print bleed" before you start designing.
- Keep text and logos at least ⅛–¼ inch from the edge.
- Zoom in to check for any white gaps along the bleed edge.
- Use high-resolution images.
- PDF Print + crop marks + bleed = print-ready.